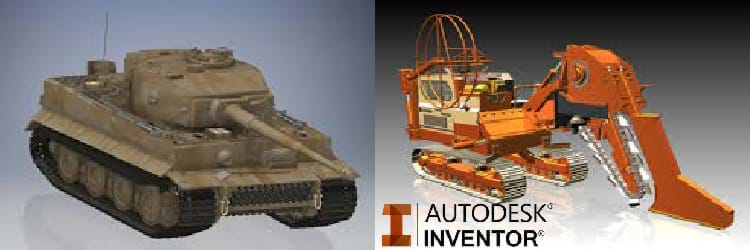
Autodesk Inventor

Course Information
Duration: 30 Hours
Fee: $1200
Description
This course is designed for the students who want to learn product design using Autodesk Inventor, which is a feature-based 3D parametric solid modeling
software. After completion of this course, the trainees/students will be able to create solid components, sheet metal components, assemblies,drawing
views with bill of materials (BOM).Also, the trainees/students will learn the editing techniques that are essential for making a successful design.
Topics Covered
1. Introduction to Inventor
- Different modules of Autodesk Inventor
- Starting new templates
- Ribbon and Tabs
- Units for Dimensions
- Important terms and their dimensions
2. Drawing Sketches For Solid Models
- Introduction to the Sketching Environment
- Sketching Entities
- Drawing Display Tools
3. Adding Constraints and Dimensions to Sketches
- Adding Geometric Constraints to a Sketch
- Adding Dimensions to Sketches
- Setting the Scale of a Sketch
- Creating Driven Dimensions
- Concept of Fully-Constrained Sketches
- Measuring Sketched Entities
4. Editing, Extruding, and Revolving Sketches
- Editing Sketched Entities
- Creating Patterns
- Writing Text in the Sketching Environment
- Inserting Images and Documents in Sketches
- Editing Sketched Entities by Dragging
- Tolerances
- Converting the Base Sketch into a Base Feature
- Extruding the Sketch
- Revolving the Sketch
- Direct Manipulation of Features by Using the
- Mini Toolbar
- Rotating the View of a Model in 3D Space
- Controlling the Display of Models
5. Advanced Modeling Tools-I
- Creating Sketching Planes
- Work Features
- Creating Holes, Fillets, Chamfer, and
- Mirror Features
- Creating Patterns of features.
- Creating Rib Features
- Thickening Faces or Surfaces, Offset Faces or Surfaces
- Embossing or Engraving Sketched Entities on a Feature
- Using the Decal Tool to Apply an Image on a Feature
- Assign Different Colors/Styles to a Model
6. Editing Features and Adding Automatic
- Dimensions to Sketches
- Edit features in a model
- Redefine the sketching plane of a feature
- Suppress and unsupress features
- Add automatic dimensions to sketches
7. Advanced Modeling Tools-II
- Sweep Features
- Lofted Features
- Coil Features
- Internal or External Threads
- Shell Features
- Applying Drafts on the Faces of a Model
- Splitting the Faces of a Model or a Complete
- Adding Surface Patches
- Stitching Multiple Surfaces to a Single Surface
- Sculpt features
- Using of Sketch Doctor and Design Doctor
8. Assembly Modeling-I
- Assembly Modeling
- Types of Assemblies
- Creating Top-down Assemblies
- Creating Bottom-Up Assemblies
- Assembling Components by Using the
- Constrain Tool
- Specifying the Limits for Constraining
- Assembling Parts by Using the Assemble Tool
- Applying Joints to the Assembly
- Making a Pattern Instance Independent
9. Advanced Modeling Tools-II
- Editing Assembly Constraints
- Editing Components
- Creating Subassemblies
- Checking Degrees of Freedom of a Component
- Creating the Pattern of Components in an Assembly
- Replacing a Component from the Assembly File with
- another Component
- Mirroring Subassemblies or Components of an Assembly
10. Working with Drawing Views-I
- Types of Views
- Generating Drawing Views
- Drafting Drawing Views
- Editing Drawing Views
- Deleting Drawing Views
- Moving Drawing Views
- Copying Drawing Views
- Rotating Drawing Views
- Changing the Orientation of Drawing Views
- Assigning Different Hatch Patterns to Components
- Editing the Default Hatch Style of the Sectioned Objects
- Excluding Components from Assembly Section Views
11. Working with Drawing Views-II
- Modifying Drawing Standards
- Inserting Additional Sheets into Drawing
- Activating a Drawing Sheet
- Displaying Dimensions in Drawing Views
- Editing Drawing Sheets
- Creating Dimension Styles
- Applying Dimension Styles
- Modifying a Dimension and its Appearance Using the
- Shortcut Menu
- Adding the Parts List
- Editing the Parts List
- Setting the Standard for the Parts List
- Adding Balloons to Assembly Drawing Views
- Adding Text to a Drawing Sheet
12. Working with the Sheet Metal Components
- The Sheet Metal Module
- Sheet Metal Component Parameters
- Creating Sheet Metal Components
- Folding Sheet Metal Components
- Adding Flanges to Sheet Metal Components
- Adding Flanges to Sheet Metal Components
- Creating Seams at the Corners of Sheet Metal
- Components
- Bending the Faces of a Sheet Metal Component
- Rounding the Corners of Sheet Metal Components
- Chamfering the Corners of Sheet Metal Components
- Chamfering the Corners of Sheet Metal Components
- Punching 3D Shapes into Sheet Metal Components
- Creating Hems
- Creating Contour Flanges
- Creating the Flat Patterns of Sheet Metal Components